Business is impossible to grow without credibility. Credibility is hard to gain and takes a long time. Till then you can always build Campaigns to attract them.
Your Key Focus Today
How to set up a new campaign
How to add promocodes to campaign
How to schedule campaigns and promocodes
Experience the campaign in messenger
Fundamentals of campaigns
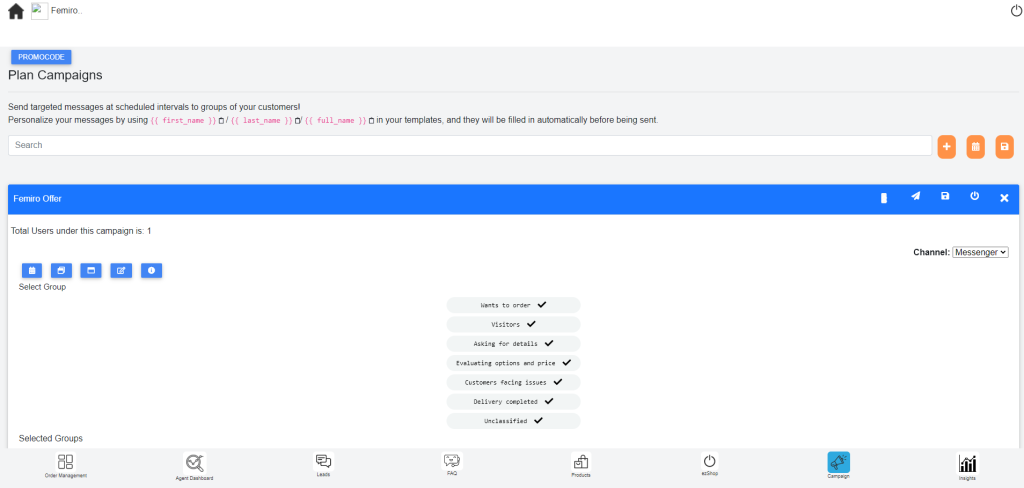
The campaign page preview looks like the one below
At the top, there is a promocode option where you can set up your new promocode. Search for already existing campaigns and at the right side of the search bar, you can add new campaign, see already running schedules and their details and save your choices.
Setting up a new Campaign
You can set up a new campaign from the campaign page. First click on the plus sign and the name bar will come where you will have to put the name you want for your campaign. Here I have added “New Year Campaign” as the name and then click on the blue tick button at the right to continue.
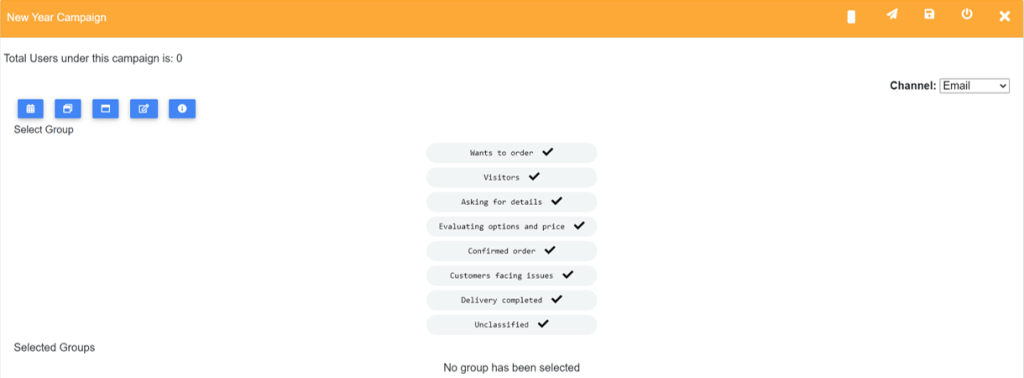
Then this orange bar will be shown below as a new addition. Click on the dropdown sign at the right of the bar and the options for that will come.
The options look like the picture below
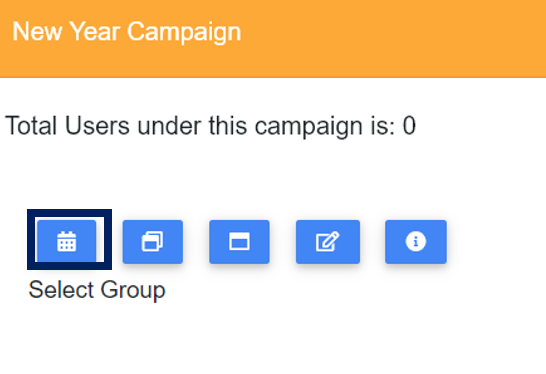
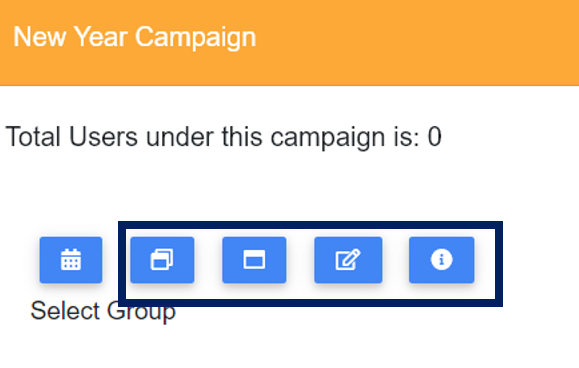
Here your current users of this campaign. Currently it is zero as you have not activated it yet.
Schedule
Clicking on the highlighted button will bring out the schedules for this campaign.
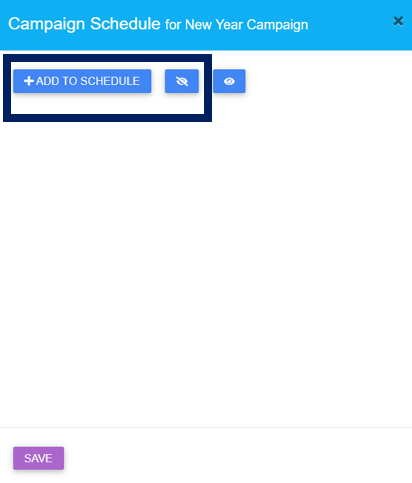
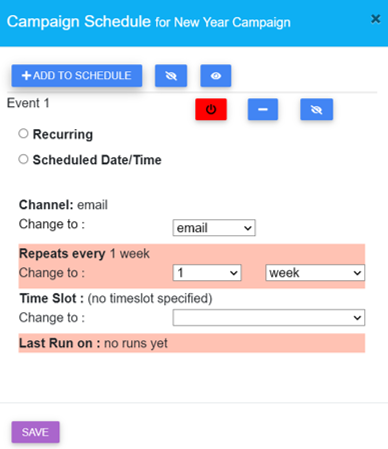
Then a new pop up will come that looks like the picture below. Click on add to schedule to set the time the campaign will run.
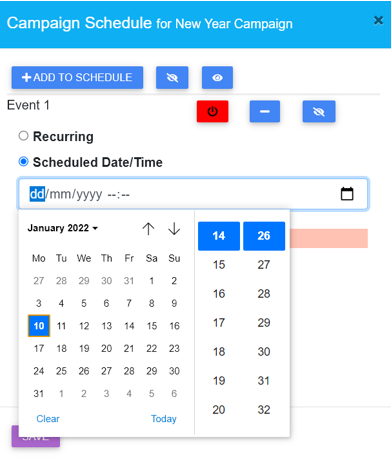
There are two different types of schedules. One is recurring and another is scheduled date or time. The recurring one is repeated after a certain period of time.
In the scheduled one, you can select a date and time when the campaign will run.
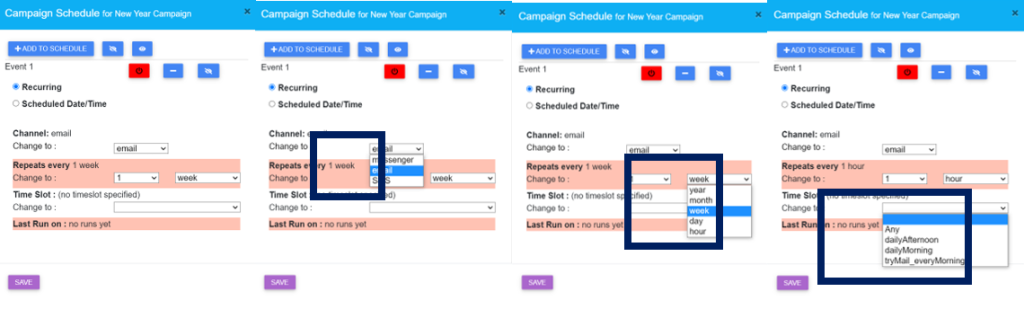
In the recurring one, you can set the channel you want to send the campaign in, then you can set the time after which you want the campaign to repeat. You can also select time slot from the dropdown list available.
After selecting your preferred ones, click on save.
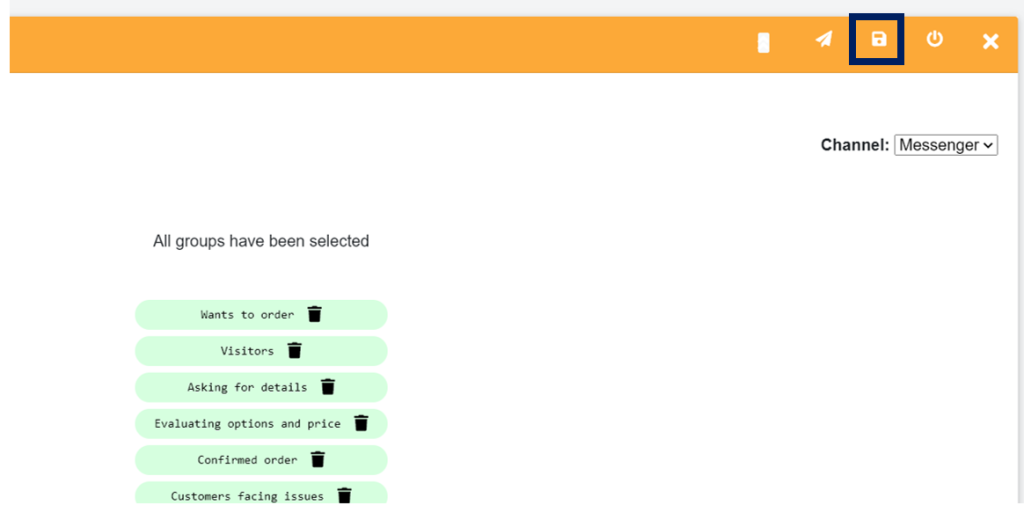
Then coming back, you can see other icons. From left to right the icons mean select all groups, unselect all groups, change campaign name, and info.
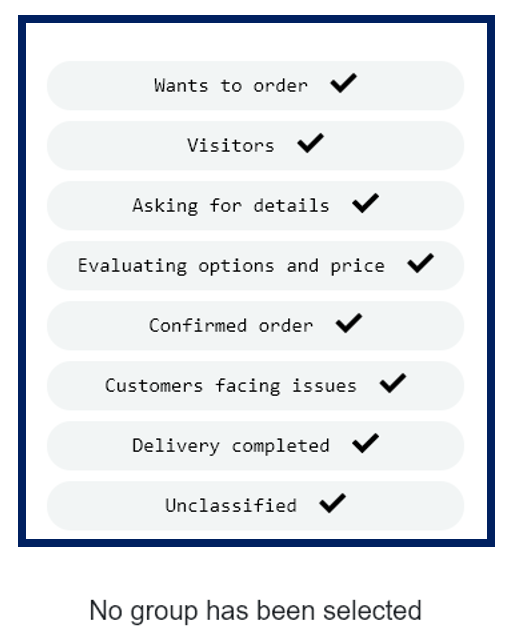
Now who will you send these to? The groups will be shown in the middle of the page. Depending on how many are relevant to your business, you will see these group names shown in the picture below.
You can click to select your preferred groups. These are the people you want to send your campaign to. You need to send the campaign to people who you want to make the purchase decision.
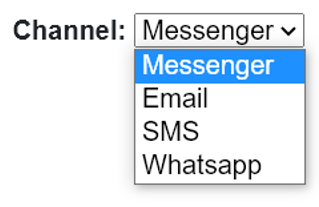
You first choose the channel on the right side where you want to send this campaign. And then select from the dropdown list where you want to send it.
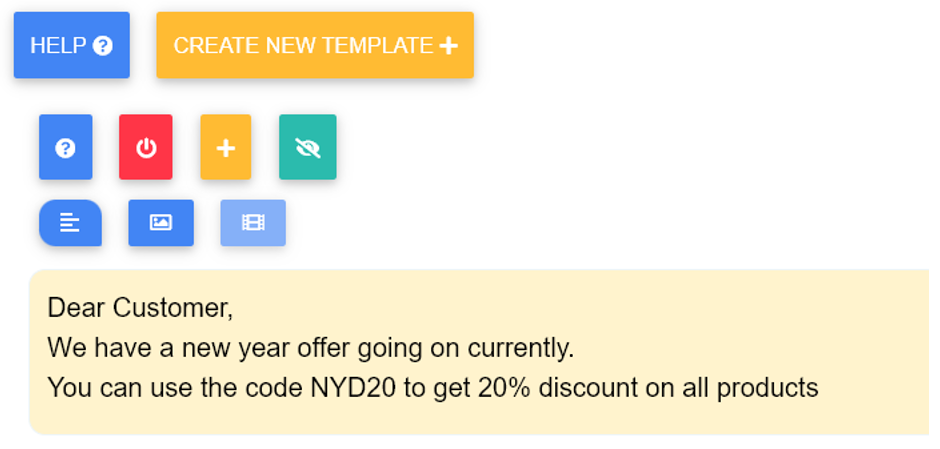
After this, you will see a template for sending the campaign to your desired customers. You can edit the text you want to send, and then click on the “Slide 1” bar to add more features to the text.
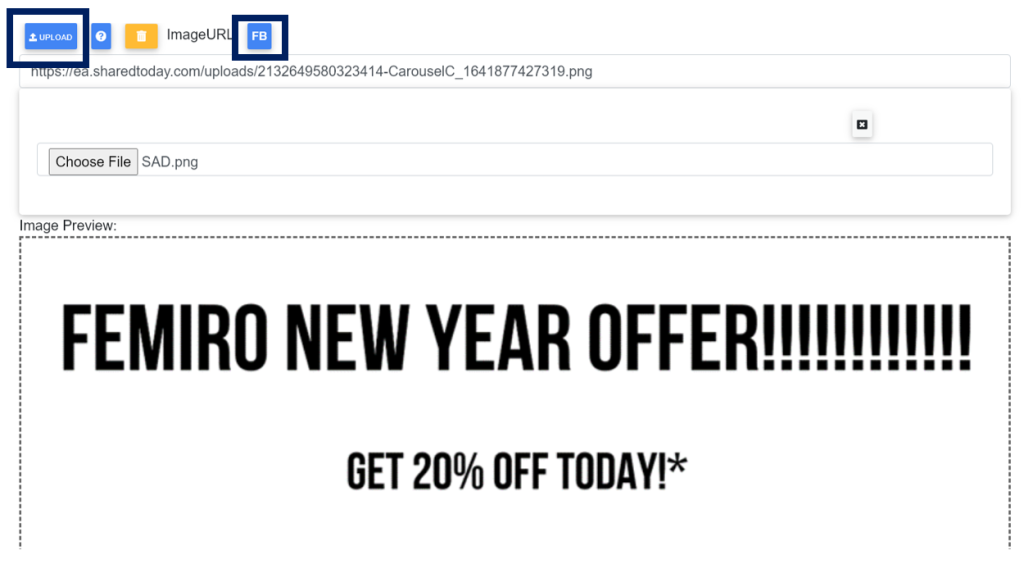
Clicking on the slide bar will bring out the options below. You can add a picture by clicking upload and then uploading a picture from your computer. You can also click on the FB button and select a picture from your Facebook page and put it here. The preview of the picture will come below like shown in the picture below.
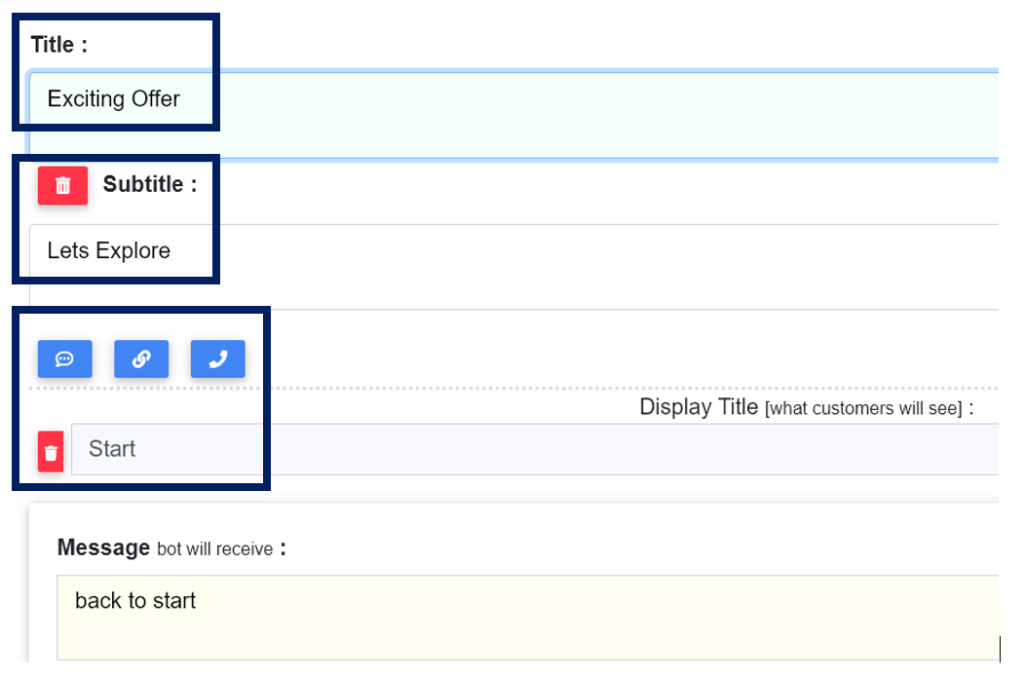
Below that, there will be an option to put the title, subtitle and add a button (reply button, link or call button) to your text.
After selecting and filling all these, go up and click the save button to save the campaign.
After that refresh the page and go to the list. Then select the campaign bar and click on the send button to send this campaign to your customers.
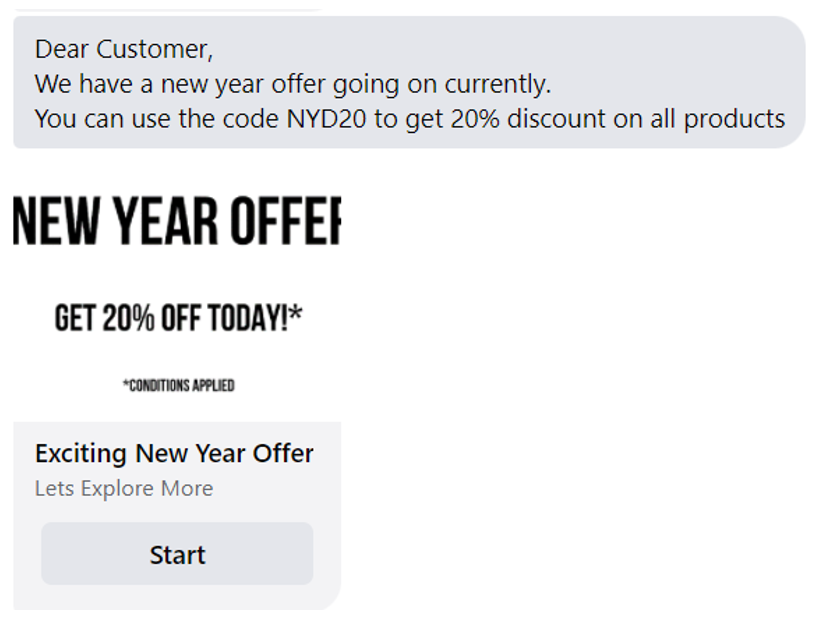
After sending it, in messenger, this is how it is shown