“Your customer doesn’t care how much you know until they know how much you care.”
Setting up products is like organizing your shelves in retail stores. You need to make it easy for your customers to find the products, learn about them and discover minor details about the variations.
Your key focus today
By now you are done with setting up the basics of your shop settings. In addition to that you have probably configured and tested your chatbot to respond against the frequently asked questions. Today you will be doing the followings
Plan Product Grouping – on paper
Add 5 Products in EZAssist
Color and Size Variation of Products
Offer discount in a product
Copy a product and then change the information
Experience your product listings in chatbot – the default Item Template
Experience the product listing in webshop
Enforce Stock for a product, make order and experience how it works
Turning a product display on/off
Reorder a product display in messenger list and webshop
Showcase your product in your online showroom
Consider your digital shop as a physical showroom, be it in messenger or website for selling. In a physical shop, you need to put your products organized in shelves, you group them in a way that users can find them easily. Setting up products in Digital is also same.
You need to plan first how you will be organizing the products in groups, tag them with right information so that customers can find them easily.
Grouping Products – The Hierarchy
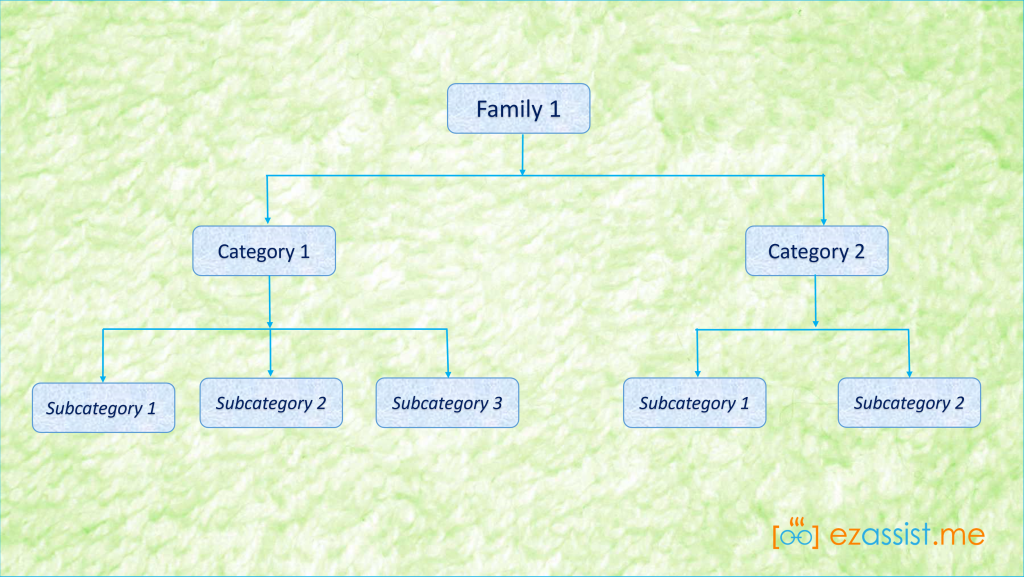
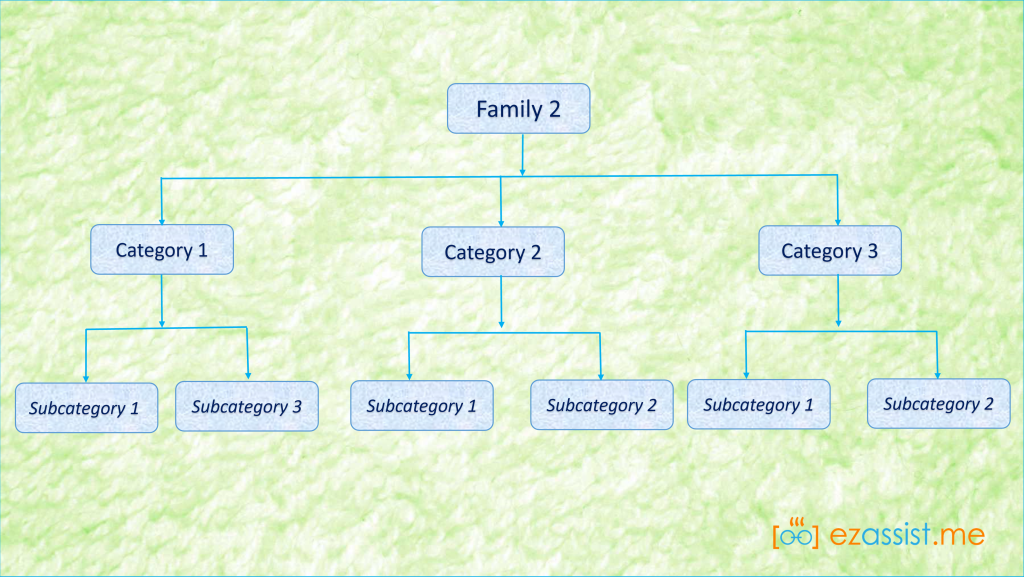
You can group products according to 3hierarchical parameters in EZAssist – Family > Category > Sub Category.
Family
Category
Sub Category
Broad product family e.g., for fashion or beauty products, family can be Men or Women. For F&B it can be Precooked Food, Frozen Food etc. This is the first layer of grouping. If you had a showroom – consider Family as the areas of showroom – how you would display products in different part of the showroom. The first layer of floor planning.
Category is the most important grouping parameter for products. Users will be browsing products based on category in webshop. The top-level menu in webshop is based on category. Consider this as the shelves in your showroom. Similar products are grouped in a single shelf. Similarly similar products should be grouped in same category. For example, in a fashion outlet, products can be grouped in Casual Wear, Formal Wear or Shirts, Foot Wear, Pants etc.
If Categories are Shelves in your showroom then consider Sub Categories as Racks. Group similar products of the same categories in same rack. For example, in super market all carbonated drinks e.g., coca cola, sprite etc are kept in same shelf. But Juices are kept in another shelf.
Why it matters – Mobile First, so keep it simple
Most of our customers will be browsing from mobile phones – either to the mobile view of the webshop or they will be interacting in messenger conversation. So, it is very important to keep the categorization simple.
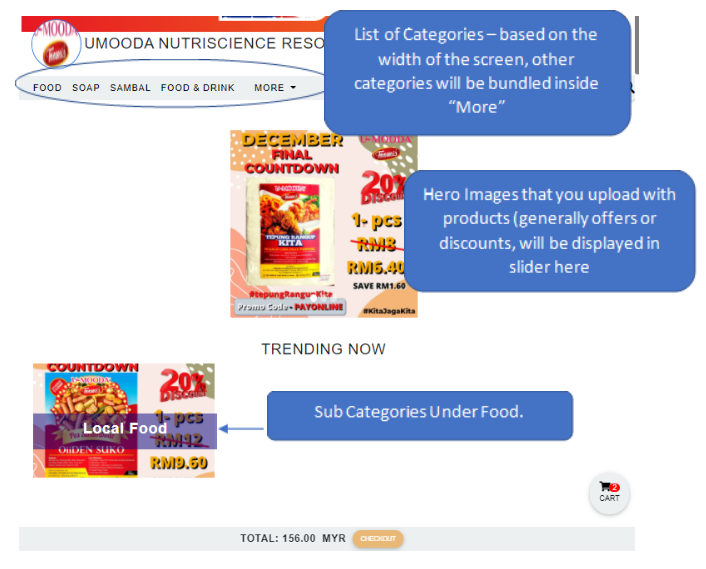
In Webshop – it starts from Category.
It becomes easier for customers to find products if the top-level categorization is less than 7. The ideal number is 5.
Under every category there will be sub categories. In EZAssist webshop desktop view – 3 subcategories are displayed under each categories. It is better to keep no of sub category limited to 3 for easier discovery of products.
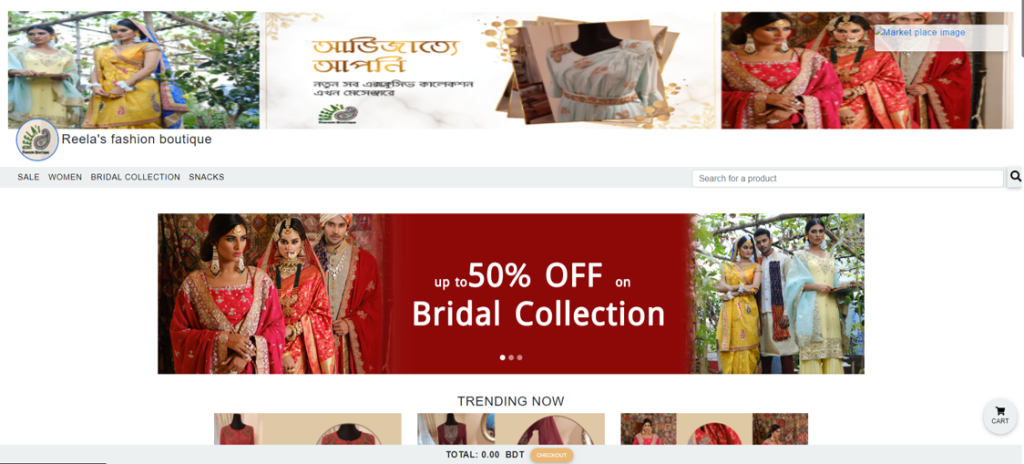
View of Web Shop (Desktop)
Follow the dimension, naming of the categories in a way it makes sense to the customers. If your business doesn’t have a lot of products – try to avoid too many categories or sub category. User needs to see the products as soon as possible after coming to your webshop.
The order of categories is based on No of Products in that category. If a category has more products, it will be displayed first
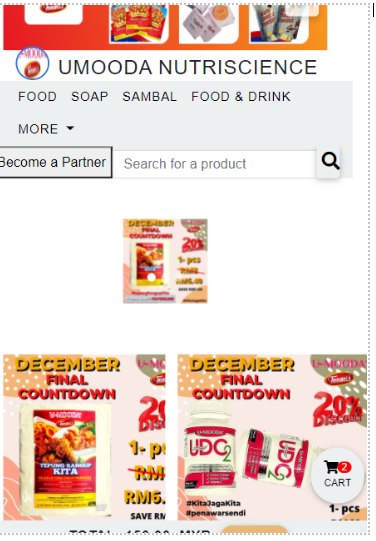
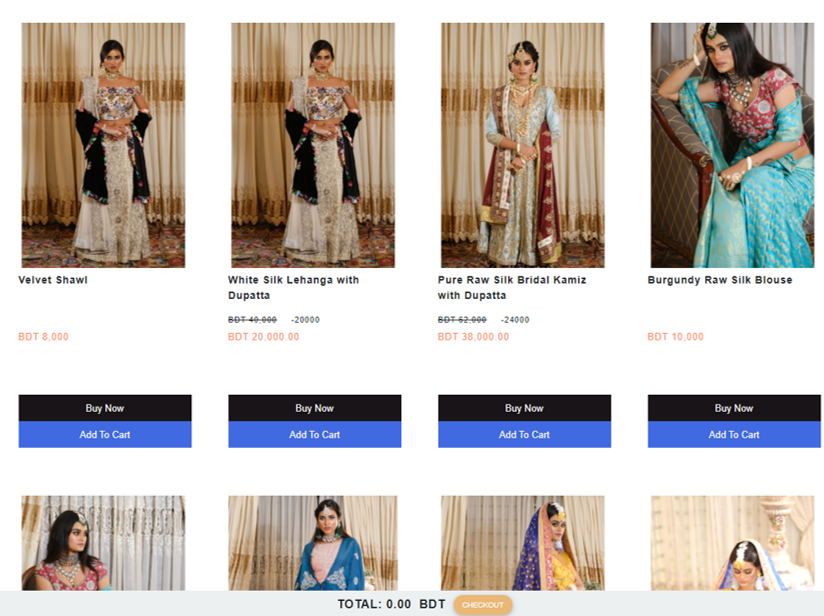
View of Web Shop (Mobile)
The subcategory block is hidden in mobile view – so that users can quickly start browsing products.In Mobile View Products are displayed in List. There will be 12 Products shown at one time.
How to Display Products in your online showroom
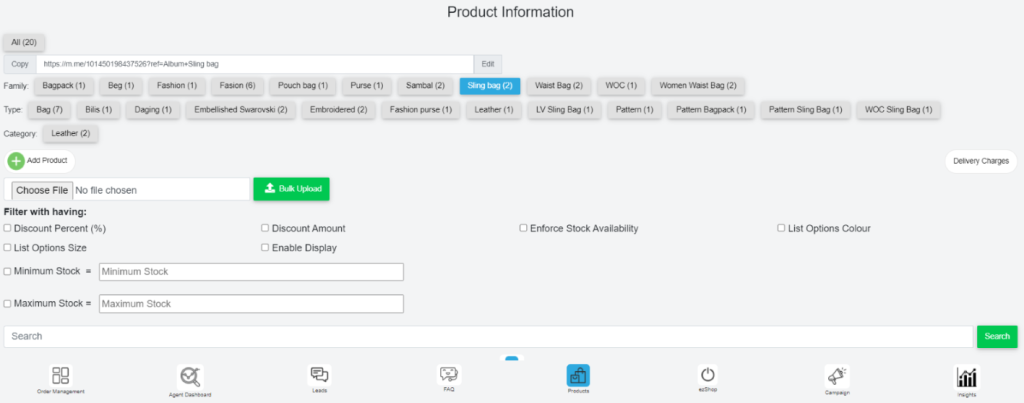
Product Catalogue Browsing
In this section, we can look for products based on the family, type, category. We can also filter with having Discount percent (will show highest discount available to lowest discount available), discount amount (will show products with highest discount amount to lowest discount amount), enforce stock availability, list options colour (will show the products with multiple colour options), list options size and enable display. We can also see products having a certain minimum stock and a certain maximum stock.
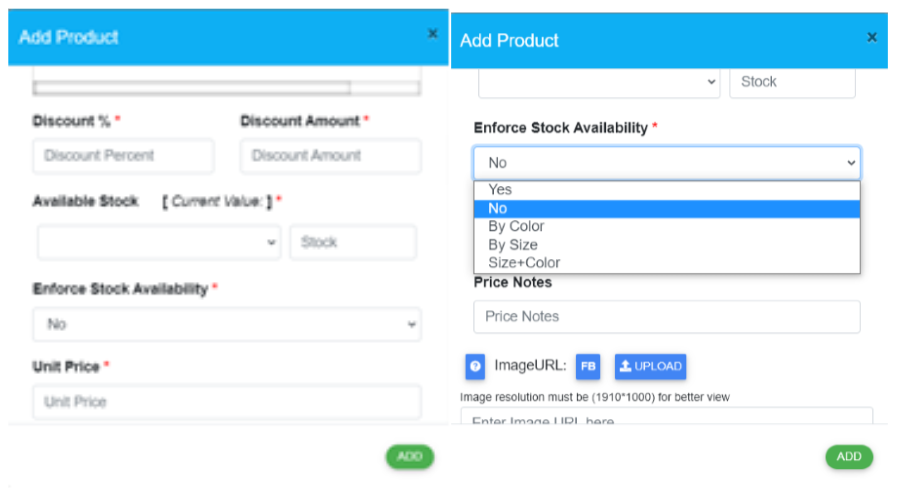
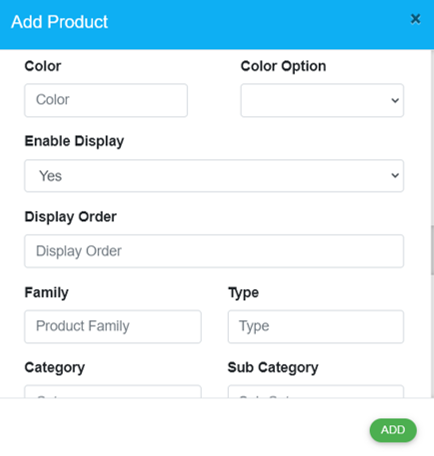
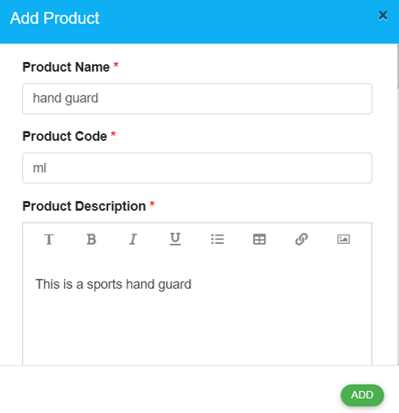
We can add new products to our website from this section. If we click on the add product, a new popup will come that looks like the picture below
Here we can add new products by giving out the necessary information. By scrolling down, we can see all the available options.
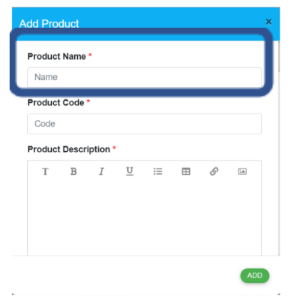
Set Product name
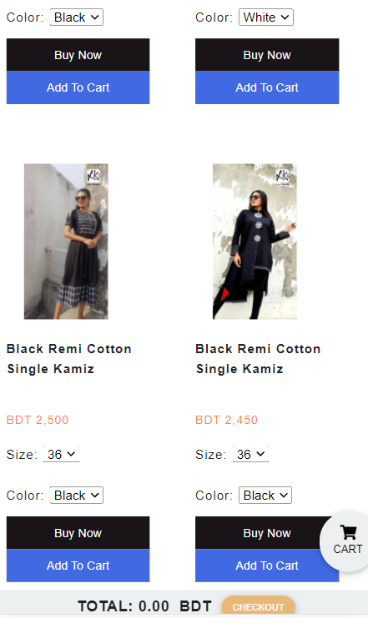
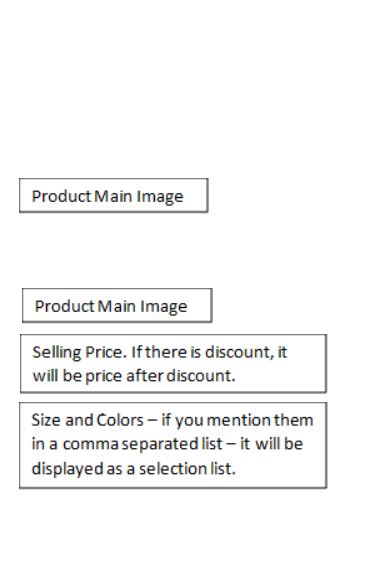
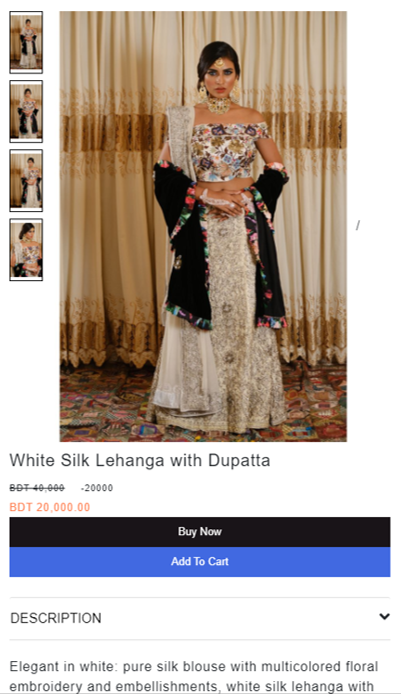
The name of the product you want shown in the website. It comes in the website as shown below. This has to be created very carefully as this is the part that will let the customer know what is shown in the image. This has to be clear and simple. It is preferable that no number or code is put in the name otherwise it can create confusion.
The name of the product you want shown in the website. It comes in the website as shown below. This has to be created carefully as this is the part that will let the customer know what is shown in the image. This has to be clear and simple. It is preferable that no number or code is put in the name otherwise it can create confusion.
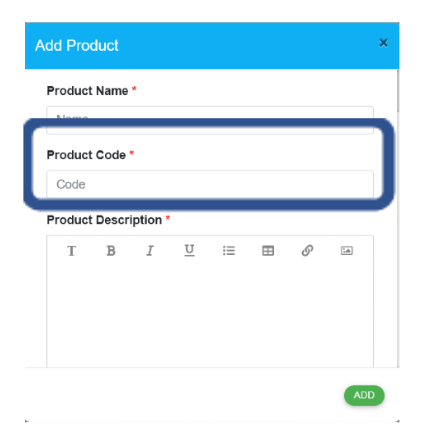
Set a unique Product Code
The code we want to give to that product. It is shown in the website the way it is shown below. It is a unique code for your products so that the system, or the people do not confuse one product to another.
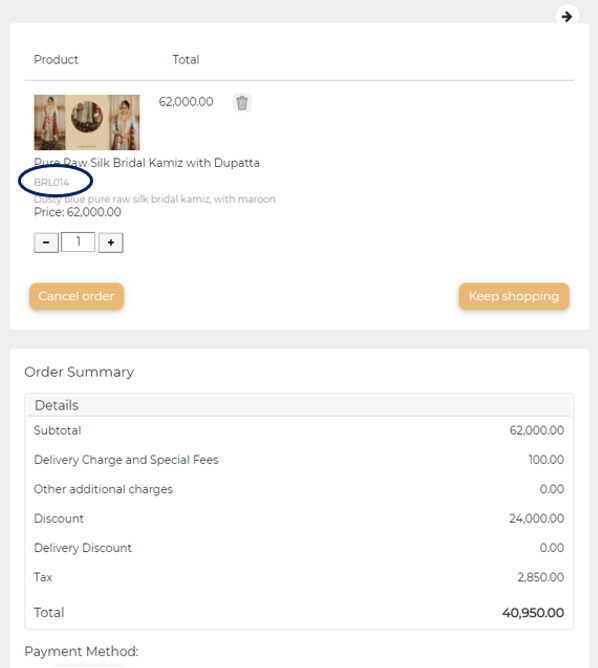
This code is not always shown in the website. When customers add a product to cart or go to checkout page, they can see the code of that product. That way is shown in the picture below.
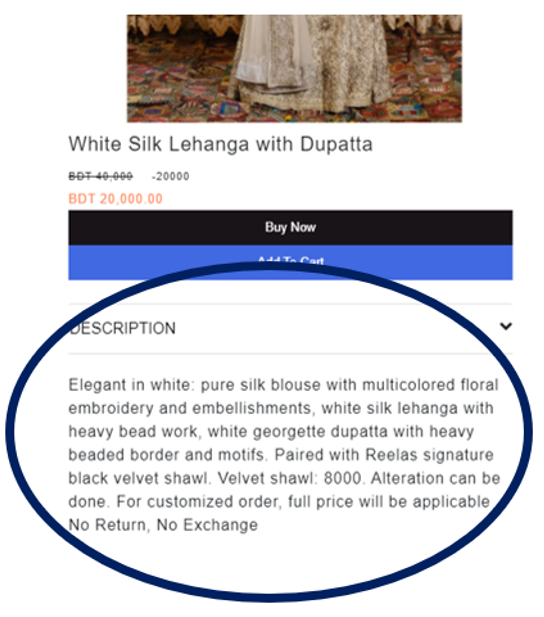
Create a Product description
Your preferred description about the product. This portion of the product details lets the customer know the details of the product, how it is made, where it is sourced from and other information. This is a great opportunity for you to capture the interest of the customer through the art of storytelling. This is how the product description is shown
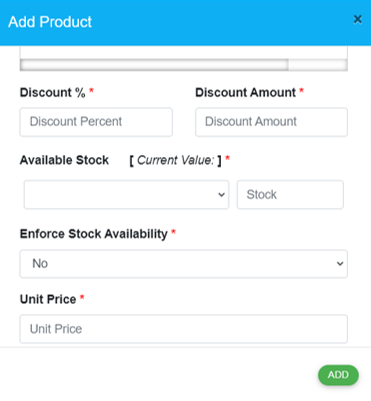
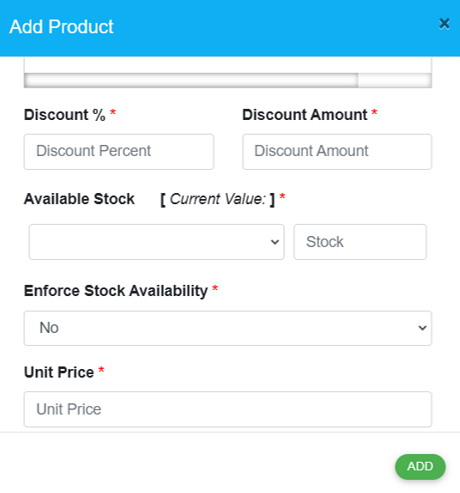
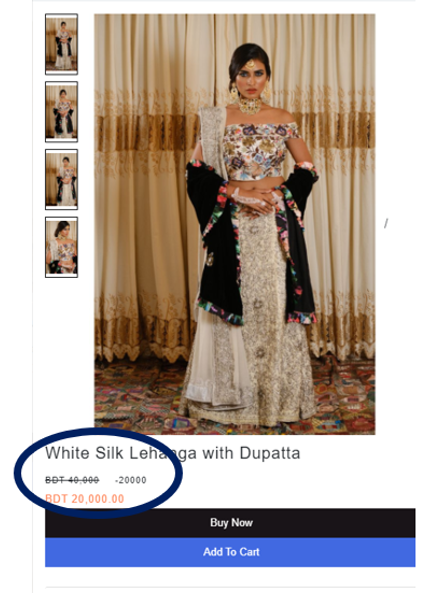
Offers and Discounts on Product (%)
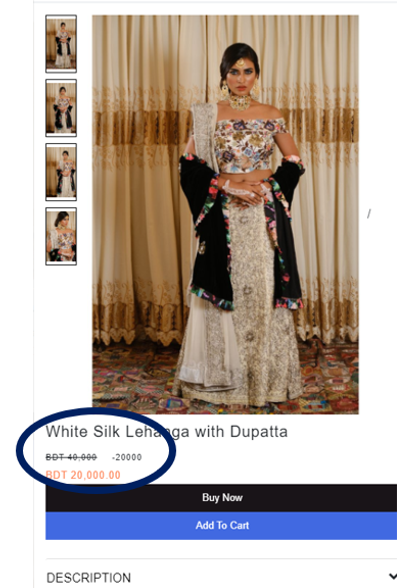
The discount percent you want to give to that product. It is shown by cutting the original price and showing the new price in the website so customers know that there is a discount going on in this product and are interested to buy. The actual preview is shown below.
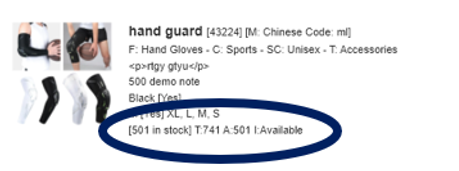
Setup Online Inventory
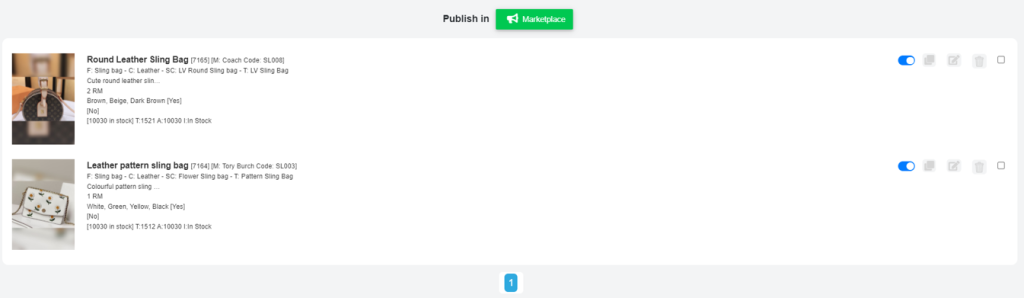
This is for you to update in the website, you can add it from the edit option of a product in the website. In the dark blue highlighted mark, you can see T: Total stock, A: Available stock, I: Available or not
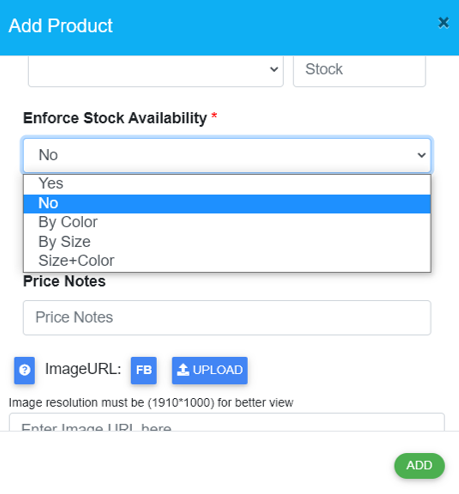
Display Available products only
You can select in what way do you want to enforce the stock availability. It can be done by colour, size, or both. If you select no here, then the product will be shown to your website regardless of availability and if you select yes here, then the product will only be show if it is available.
Set a Unit Price of the Product
The price you want for that product. It is shown below the product name in your website. If there is a discount, then it is shown after the price reduction. The actual preview of website is shown below.
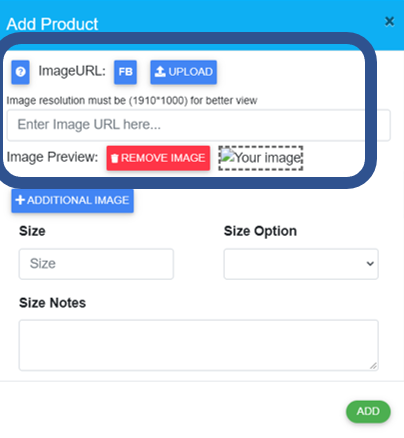
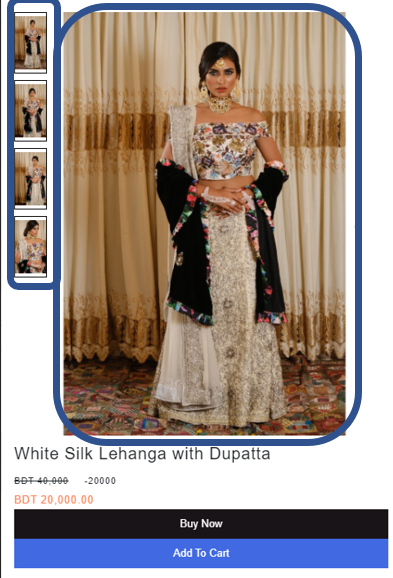
Upload a Product Image with correct size
We can add image of our product. We can upload it from our computer, add that product’s image link from Facebook. We can also add additional images to our product. The first picture is the main image and the small ones in the left are the additional images. This is how images are show in in the website when they are properly added. The resolution for the main image must be (1910*1000) for better view as that is the optimized value for Facebook and most other platforms and the resolution for additional images must be (760*1100) for better view.
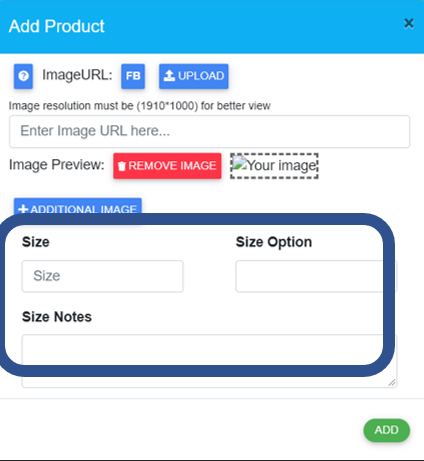
Classify the product SKU
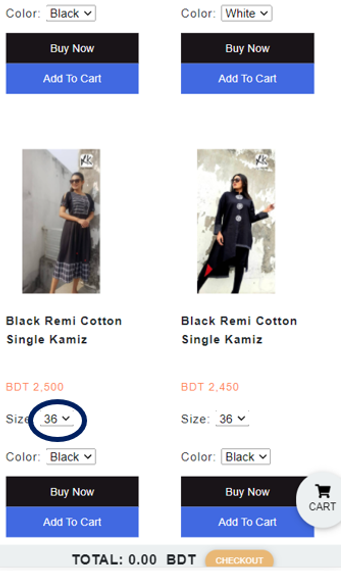
We can add the sizes of the current product. We can do it by putting comma in between the sizes (X, M, L, XL) or (28, 30, 32, 34, 36) or whichever other way we prefer. If the size option is put as yes, the sizes with comma will be shown in the website. If the size option is set to no, no size option will be shown. We can add size notes as per our preference (for example: Custom Size can be made)
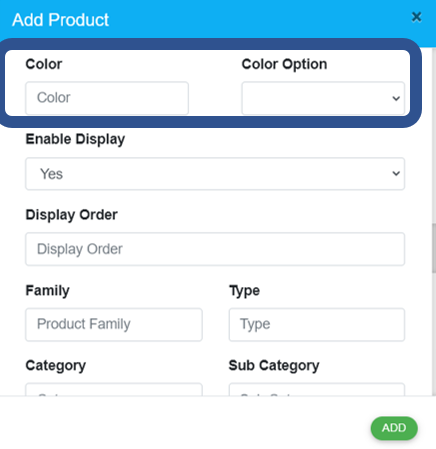
Colour
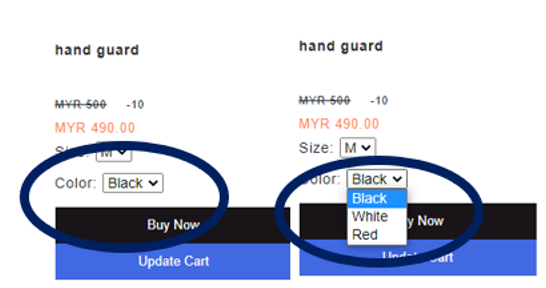
We can add colour the same way we added size (using comma in between the options). The colours are shown in the website the same way as shown in the picture. Clicking on the dropdown list will show the available colours.
Set the Product Display order
This means where do we want this product displayed in your website. The higher the number we put here, the less advance the product will be shown in the website. That means the lower the number, the higher the position in the website.
Product Stock Info
How much stock is available or when will it be restocked if stock is not available. This is also usually not shown in the website. But you can see it in the product list section. We can also add more info as per our preference.
Product Weight, Weight Unit, Volumetric Weight, Volumetric Weight Unit
These are options for shipping as the charge depends on the weight in that case. We can add the weight and volumetric weight for products that we want to ship.
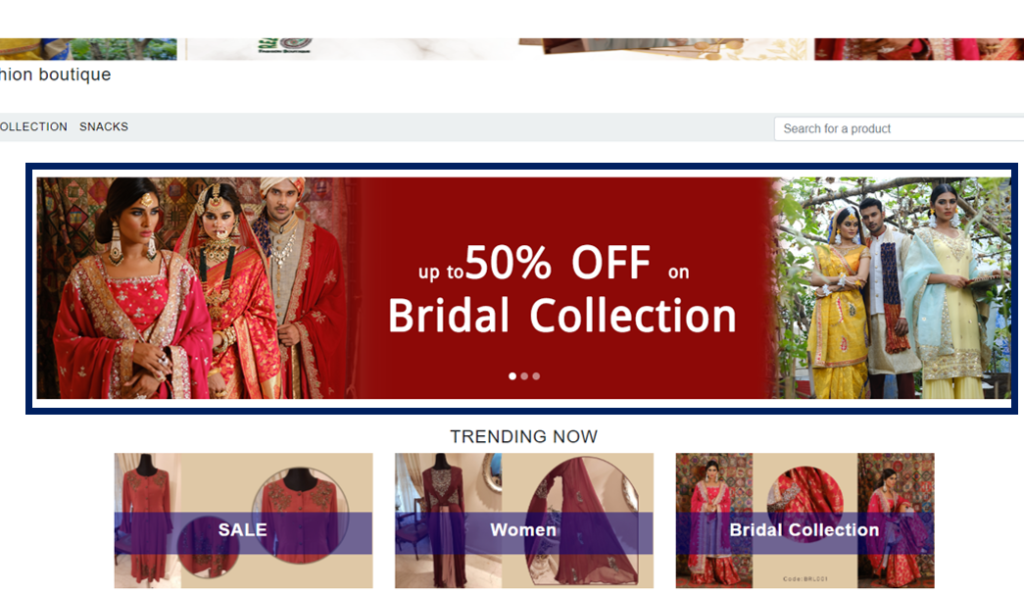
Set your Promo hero image in the Web Shop
In the website, at the top sometimes picture sliders are shown (as in the below picture highlighted in dark blue) to promote that certain product. We can add that kind of product picture in our website to better promote it.
After adding all this, we click on the add button and the product will be added to our website and we can also see them in the product list.
Product Dashboard View in EZAssist
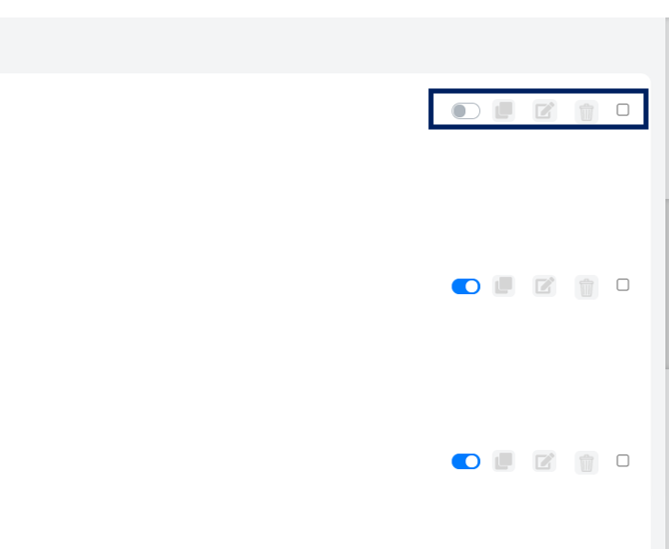
In the product list section, we can see our added products with descriptions and details. At the right side of the page, there are some buttons. These are:
1. Activating a product: We can turn the blue button on and off to activate and deactivate a product in our website. Deactivating a product will not show the product in our website anymore unless we activate it again
2. Copying a product: Clicking the copy button will take us to the same add product pop up, only this time the details of that product will already be here. We just have to change the information here slightly that matches our new product and add the new product that way without much work
3. Editing the current product: Clicking the edit product button will also take us to the same pop up where we can edit the current product description.
4. Deleting the product: Clicking the delete button will delete the selected product.
We can publish our products in selected marketplace around us. (e.g., Facebook, Shopee etc.)
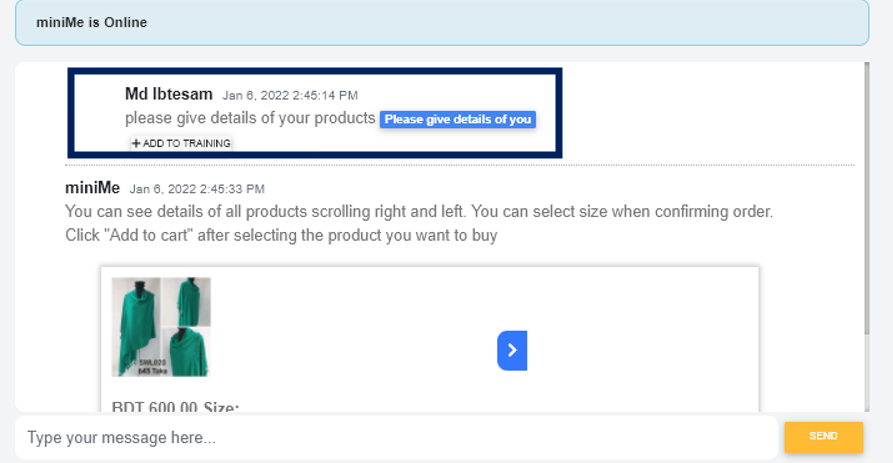
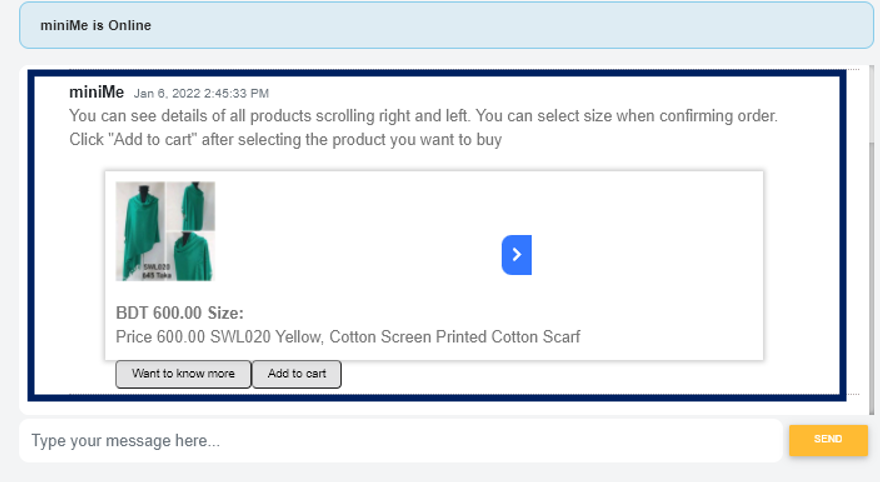
Experience product carousel in chatbot
If we go to the FAQ section and click on show activate, we can experience the product listing in chatbot
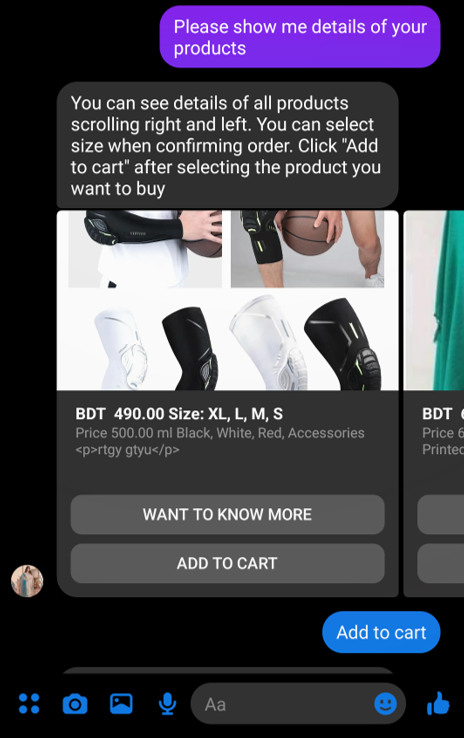
This way if the customer types in the messenger, the product will be shown without manually adding the listing in the chatbot.
We can also see what happens when actually someone texts in messenger
As we can see, if we text album shirt, whatever product is listed as album shirt in the website comes in the reply as a carousel ad.
Experience product Display in Web shop
We can see all the information we have given before in here.
This way we can see all our products in the website, webshop, and messenger as well.